Importing a Point Cloud
1. In ArchiCAD, please go to a plan view, then File > Interoperability > Insert Point Clouds…
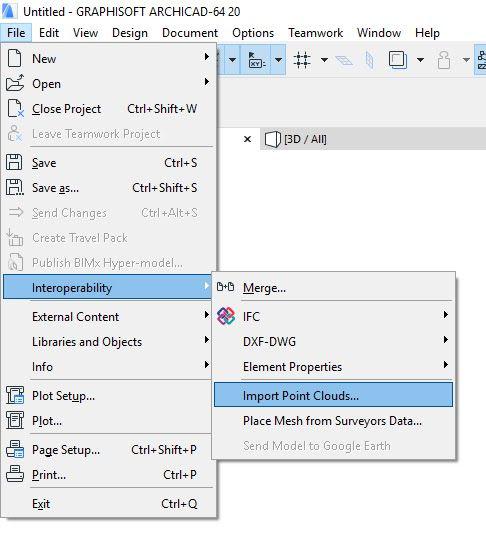
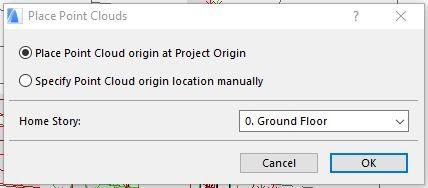
2. Choose E57 File > Open > Create and Place > Place Point Cloud origin at Project Origin > Home Story – 0.
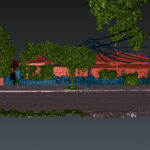
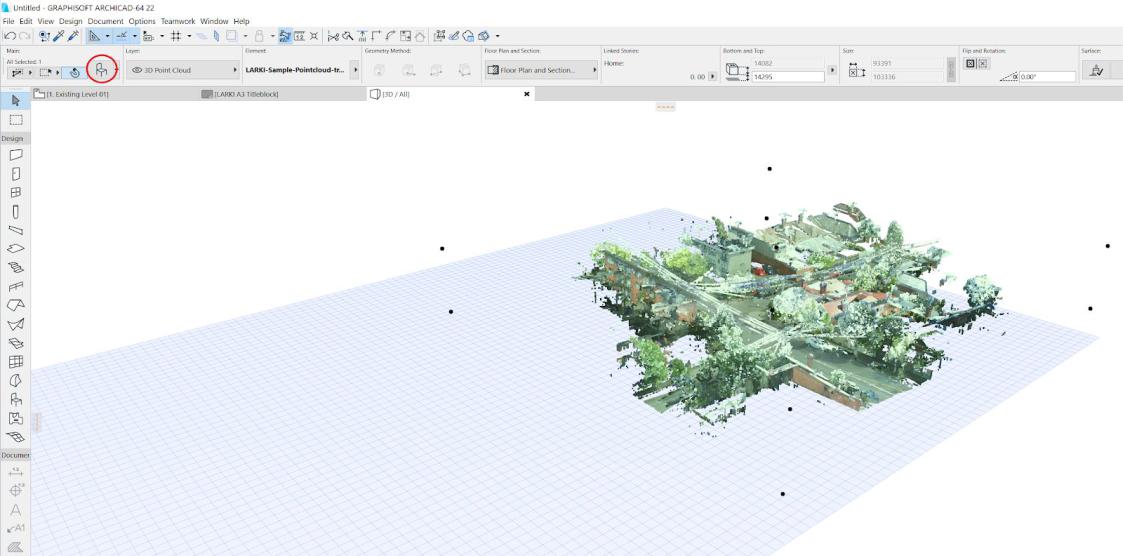
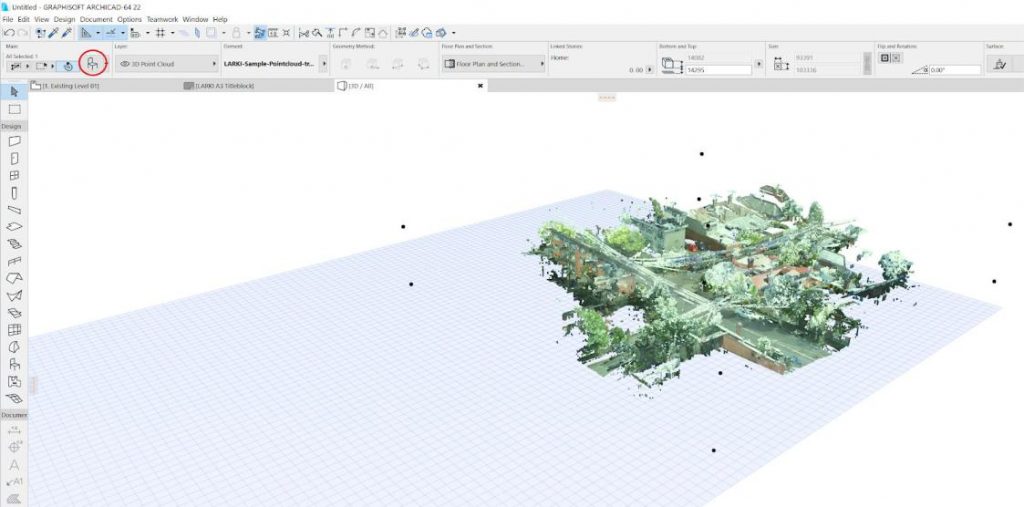
The easiest way to see the point cloud is to go to the 3D view and to full extents.
3. Select point cloud and open the object settings dialog.
4. Under Floor Plan and Section > Floor Plan Display > Show on Stories, set to All Stories.
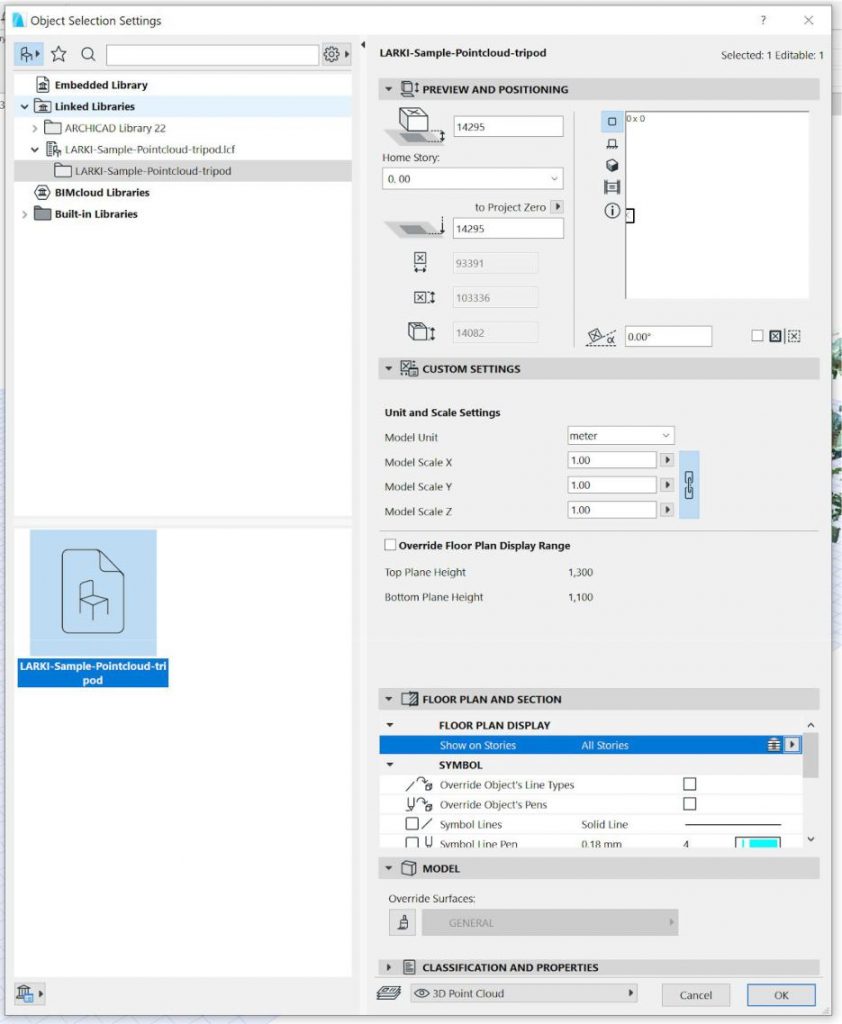
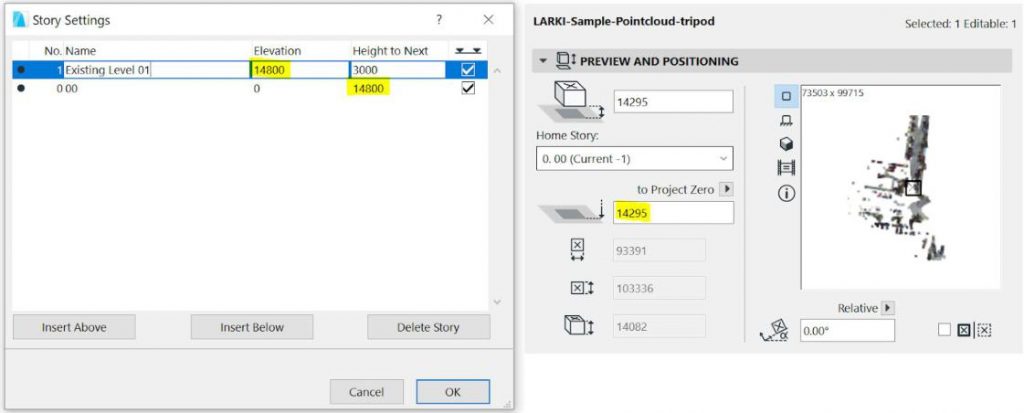
5. Please ensure the Story Settings are set at an appropriate height that relates to the elevation of the point cloud.
(This would be set up for you when we provide you with a BIM file.)
6. You’re all set!
It is recommended to keep the point cloud where it is (i.e. don’t move it). Then move and rotate the project layouts to suit the real world truncated location of the point cloud; with coordinates of noted survey control points that can be shared with other consultants for coordination. The truncation amount is shown on the 2D drawings.
If you need to edit the point cloud (e.g. delete the points representing the parts that will be demolished) – this is a free point cloud editor that works on Macs:
Download CloudCompare from:
https://asmaloney.com/software/
If you are facing any issues with importing the point cloud, please continue to the FAQ on the next page.
Frequently Asked Question
1. I’ve followed the steps but the point cloud appears mirrored / rotated / in the wrong location. What’s happening?
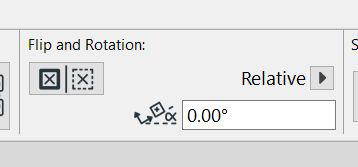
Step 1
Select point cloud and ensure Flip is unselectedand Rotation is set to 0.00°.
* Please ensure these settings are applied before importing the point cloud, to prevent it from happening upon import.
Step 2
Reposition the point cloud to project origin.
Right click on point cloud > Move > Move Selected Point Cloud by Origin

Scroll out until you see the project origin mark ![]() and click on it.
and click on it.
2. The point cloud is not showing even though it seems like it is imported?
Please ensure the layer you are importing the point cloud on is unlocked and visible.
If you are still having issues with the point cloud, please get in touch with a LARKI representative. We’ll be happy to assist.
Aligning CAD Plans
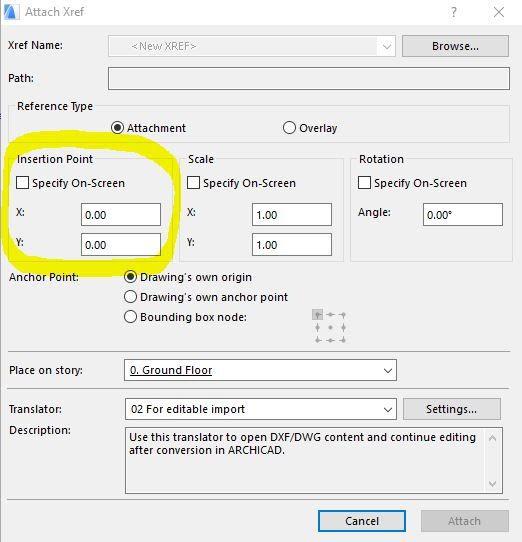
- File > External Content > Attach Xref…

2. Please ensure it is origin to origin, by inserting X: 0.00, Y: 0.00.
3. The 3D point cloud and the DWG should be in the same aligned location.